Tuesday, October 27, 2015

Sewing the Side Seams and Adjusting the Fit - Style Arc Misty Pull-On Jeans Sewalong

Friends, it is a rainy dreary day here in Indiana.  Quite appropriate as my hubby's company announced a major lay-off looming before year's end!  My mind is whirling over this.  I will probably get in to this a little more down the road.  But today, we focus on sewing.

First some commentary about the Misty Jeans pattern.  If you have already sewn ahead, I want to know how your jeans are fitting.  I have had one sewist state that her jeans were small.  Like, can't get them past her knees small.  Aside from her, everyone else has stated that the jeans are big.  I, myself sewed the size 30, when the pattern showed I needed a size 34.  I sized down because my fabric had a good amount of stretch though.

There also seems to be some variance with how the pdf pattern is fitting.  So, please tell me what you are finding friends.

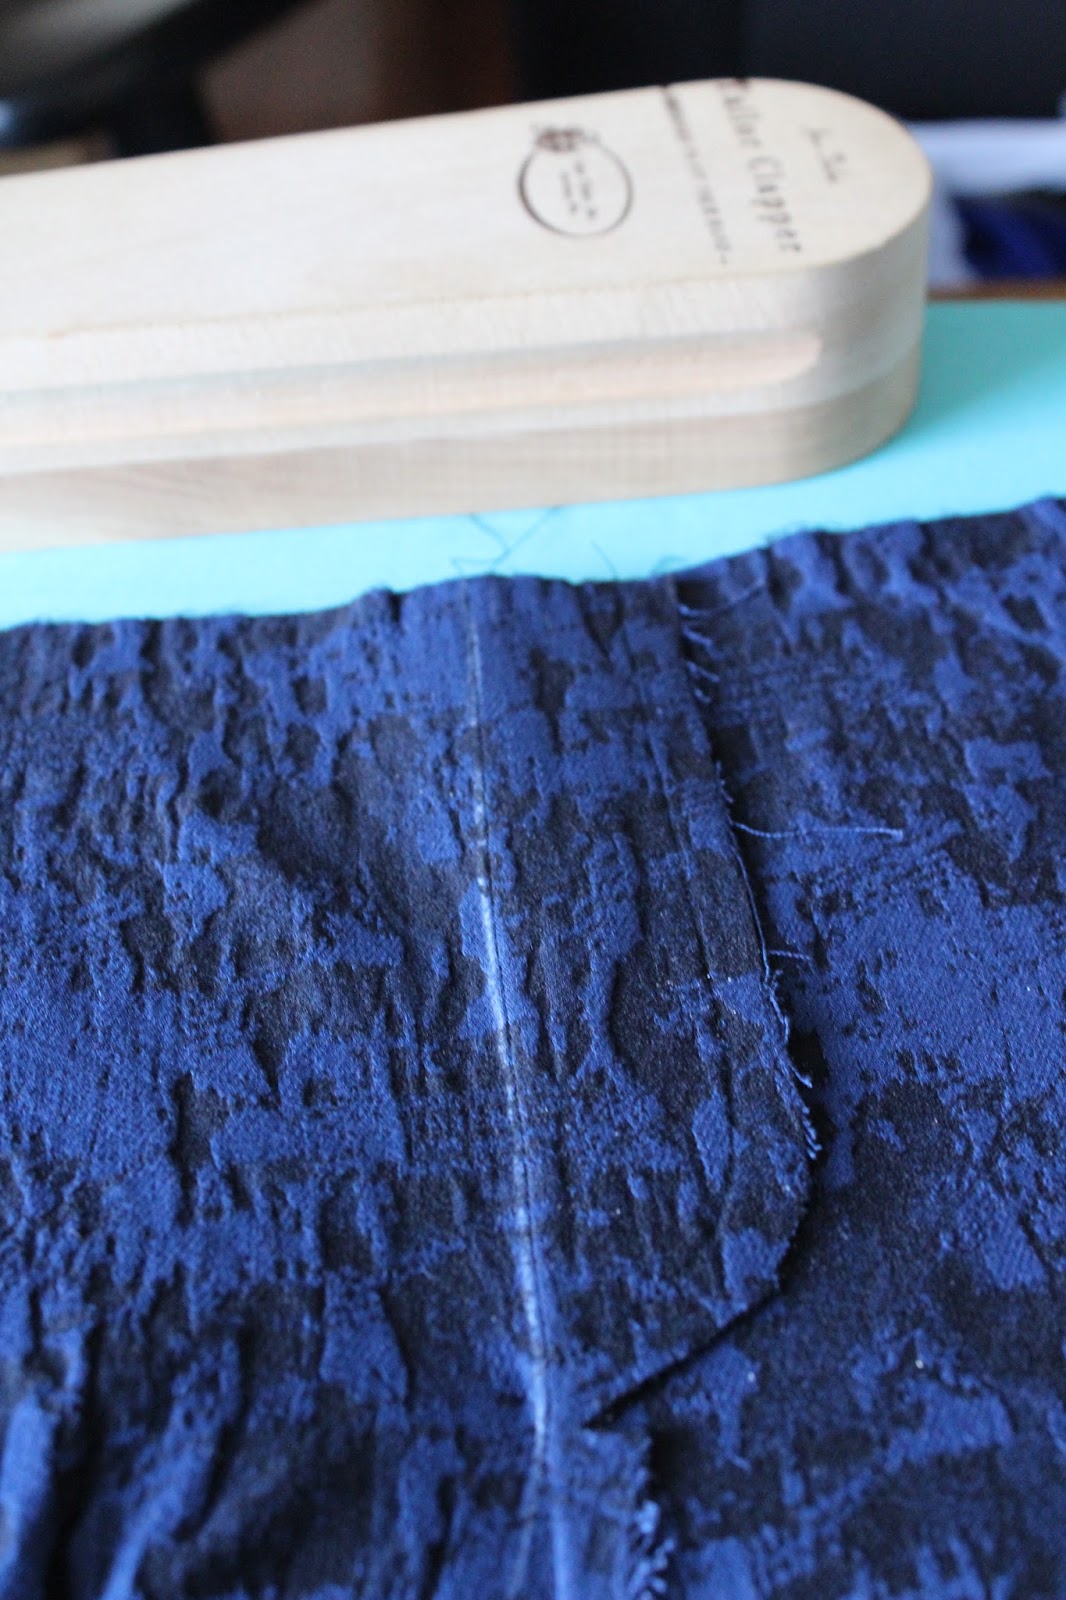
Sewing the side seams of the Misty Jeans is actually a pretty easy step.  It is just one long line of stitches on each side of the jeans.  It is so easy that I forgot to take pictures.  Since you are sewing this seam in the direction that your fabric doesn't have any stretch you can use a straight stitch for the entire seam.  I used a 2.5 stitch length.

Here is the picture I posted on Instagram after I sewed the side seams (did you see the floral denim I posted yesterday?).


The fit in the behind is pretty good.  I could still use a sway back adjustment, but for the most part, I am pleased with the fit of the backside.  In the front there is a slight amount of pulling from the crotch seam towards the upper hip.  Some would call this a diagonal smile wrinkle.  This indicates that I need to lengthen the crotch.  Because of this, when I revisit this pattern, I will add length to the height of the crotch as well as the depth.

The biggest offender here to my eyes is the saggy baggy knee look that I have going on.  This is because I have knock knees.  I was born with knock knees.  My own family teased me endlessly about the fact that I couldn't stand at attention with my ankles together.  On my next pair of Misty Jeans, I will need to make a knock knee adjustment.  The easiest way to explain this is that you redraft the lower portion of the pattern to match how your legs come down from your hips.

Way back in 2011 Colette released a Pants Fitting Cheat Sheet.  This little sheet is a wealth of knowledge for figuring out what is wrong with the fit of your pants.  Most of the adjustments are linked to tutorials that will help you perform the adjustments.  My best advice is to start from the waist and work your way down fixing the fitting issues with pants.  Once you figure out what your own personal fitting issues are, you will be able to quickly make these adjustments to every pants pattern.

Because I will not be able to make the crotch adjustments needed, I will go ahead and put the waistband in to these pants.  They are wearable as is, they just need the mentioned adjustments to look their best.  As for the legs/knee issues, I will be taking them in from just above the knee on the side seams.  This isn't a true fix to the knock knee issue, but it will help some.  If you are bow legged, you would want to take the leg in from the inseam.  If you have legs that come straight down from your hips (the way patterns are drafted) but needed to take the legs in, you would want to take the pants in equally from the inseam and the side seam.  Does this make sense?

With this pattern, it would be much easier to make adjustments before you put the waistband in the pants, just make sure that you are pulling the pants up to where they would fit with the waistband in.

I hope this portion of the sewalong hasn't been too confusing.  If you need help figuring out the adjustments that you need, don't hesitate to comment below.

Up Next:  Adding the Elastic Waist and the Finishing Touches

Thursday, October 22, 2015

Sewing the Crotch Curve and Mock Fly - Style Arc Misty Pull-On Jeans Sewalong

Friends, we are in the homestretch here!  Those of you who follow me on Instagram got a little sneak peak yesterday at something that is starting to resemble jeans.

Today we are sewing the crotch curve and mock fly.  I don't really like that word crotch, but I can't really call it the lady business curve, or the down there curve.  Can I?

Our first order of business is to pin the crotch curve together.  What that means, is we want to take the two pieces that we now have, and pin them together at the seam that goes around the crotch.  This also encompasses the mock fly area.


Starting at the mock fly begin placing your pins through your two garment pieces.  As you can see in the picture above I made a little boo boo while I was cutting my fabric.  Fortunately, this nick in to the seam allowance is more shallow than the actual seam allowance.  Otherwise, I would have had to re-cut these pieces.


As we pin our way around the curve, we want to make sure that all of our notches are aligned.  I like to put pins at each of the notch points, or in the case of a double notch like the one above, I will just pin in between the two notches.  

Can I just talk about something off topic for a sec?  In every photo of my thumb, it looks like I have a dirty thumb nail.  I don't.  I don't know why it looks this way either, except that I have really deep nail beds that have a very dark red line between the pink and the white part of my nail.  But the rest of my nails don't seem to look that way.  Anyway, I just wanted to say something about it, because it really bothers me.


This photo is of the area where the two inseams come together through the curve.  I always push the seam allowances in opposite directions so that I am not sewing through 6 layers of material at this juncture.  I like to put my pin straight down through the two inseams so that when they are sewn they will line up nicely.


I forgot to take an up close shot, but I also made sure that the seam of the yoke lined up evenly so that it will match after sewing these two pieces together.

At this point we are ready to sew this seam.  You are going to want to use your lightning bolt stitch here because this is probably the most stretchy seam of the entire sew.  This seam is sewn with a 3/8 inch seam allowance. If you are like me and have paranoia about only having one line of stitching holding your arse in, go ahead and sew a second row of stitching at the 1/4 inch line of the seam allowance.

Once you have finished your yoke should look something like this.


Now can you read the word that is printed on this fabric?  Friends, I am going to have the word WASH all over my arse.  I have mixed emotions about this! Thing is, you really and truly don't see it in the print, but the camera lens picks it up like crazy!


 Hopefully the outside of your crotch curve seam looks something like this.  If you are new to sewing and your seams are off by a 1/4 inch or so, don't beat yourself up over it.  My best advice is that you have to think about lining things up where the seam allowance is instead of at the edge of the fabric.  Does that make sense?  Remember too, hopefully no one is going to be getting down and inspecting your crotch curve seam.  So unless you sit in a very un-ladylike manner, no one will ever see this seam.

Serger Sewists - IF that is a big capital IF, you are really comfortable with your serger this is a great seam to sew with it.  I would personally fold the mock fly back and start sewing at the start of the crotch curve that meets with the mock fly, and sew out to the yoke end.  Then, I would flip my garment and sew from where the mock fly meets the crotch curve up to the waist.  Unless you have mad serger skills, I WOULD NOT attempt to sew this as one long seam.  Only you know your limits, and you could mock this seam up on some practice fabric and see how you do.  Just remember once the knife cuts the fabric, there is no going back.

Now on to the mock fly.  The first thing that we want to do is mark the sewing line from the waist to the end of the fly curve.  You want this line to be parallel to the straight edge of the mock fly and to join to the stitch line for the rest of the crotch curve.


A good ruler and tailor's chalk are important tools for sewing.  A box of multi color tailor's chalk is relatively inexpensive and will last you for a very long time!


Once you have your line drawn, go ahead and pin the fly area together.  You don't want your fabric to shift while you are sewing this line.


Now, sew a straight line ending a few stitches in to where your chalk line meets the crotch curve.  I used a straight stitch here, because these stitches are not going in the direction of the stretch of my fabric.  I used a 2.5 stitch length, because I wanted a tighter/smaller stitch for this application.


Hopefully, in the picture above you can see that the stitching ends a few stitches in to the crotch curve seam.


Now, with our mock fly spread open with the right side of the garment facing down, we want to press the mock fly towards the right.


Again, using our clapper here will help get a nice crisp seam, so if you have one, use it.  If you don't have one, might I suggest a heavy book.


Once the mock fly is pressed flat it will look something like this.  Is your fabric fraying like mine is?


When we flip the fabric over to the other side (the right side), you should have  a crisp seam.


So that we know where to stitch, you want to feel the edge of your mock fly through the fabric, and then use your chalk to mark along the edge.

Now let's put our double needle back in to our sewing machine.  The instructions did not call for a double needle here, but I like the continuity of it, and I like the way the double needle is going to catch the edge of the raw fabric.


I didn't pin the beginning of the seam here, but I did want to throw a couple of pins in to the curve, because that is where the fabric is most likely to shift.  I placed the stitch/chalk line, just to the right of my left twin needle.


Remember to stitch forward and back to anchor the seam, and then go ahead and sew all the way to edge of the mock fly, also ending with a reverse and forward stitch.  It may take a little practice to end your stitching right at the edge of the fly seam.  Don't worry about it.  Again, who is going to be down there inspecting your sewing prowess?


This is what the finished mock fly will look like from the front.  If you wanted to make this look even more like a real fly, you could add some top stitching down the straight seam of the fly, and even a bar tack.  Those are all design details you can decide about on your own.


This is what the back side of the mock fly looks like when sewn with the twin needle.  See how the raw edge is encased between the two rows of stitches?  That is why I chose to use the twin needle and used the alignment that I chose with the stitch/chalk line and the left needle.  Does it all make sense now?

That is all for this step, Friends.  I can't believe that this project is almost finished, can you?  Don't worry if you are running behind, because obviously I am too!  You are going to have until November 15th to get your Misty Jeans made if you want to try to get in on the prize action.


Wednesday, October 21, 2015

Sewing the Inseam - Style Arc Misty Pull-On Jeans Sewalong

Well Friends, so much for one post a day to get caught up!  Today let's talk about sewing the inseam of the Misty Pull-On Jeans.  This is actually a pretty simple step.

First let's match up the two sets of pattern pieces.  You want to match left front pattern piece aka the piece with the coin pocket to the back right pattern piece.  If you are looking at the back pieces on their right sides (right as in correct or the part that would be seen from the outside) then the back right (directional in this context) pattern piece would be the one where the wide part of the yoke is on the left and the outer narrow part of the yoke (hip edge) is on the right hand side.  Does that make sense?  Once those two pieces are paired, you know that the remaining two pieces pair together.

Align the Notches as You Sew

With right sides together align the inseam for sewing start at the crotch end of the seam (the pointy end) and align the fabric matching the notches as you go.  I don't pin the inseam.  I get the crotch end started with a lightning bolt stitch with a 3/8 inch seam allowance, and sew through the curve with the lightning bolt stitch.  Once I have exited the curve and will be sewing the straight line that goes all the way to the ankle, with my needle out of the fabric, I switch to a straight stitch and sew a 2.5 length straight stitch all the way down this line.  As I go down the line, I use the notches along the way as the spot where I am holding the fabric together to insure that things line up properly.

The reason that I switch between stitches, is I need the stretch across the curve that the lightning bolt gives, but at the straight part of the inseam there is no stretch in the direction of the stitches, and I don't like the way a lightning bolt stitch feels rubbing against my inner thighs.

I don't know about you all, but one line of stitching is not enough to convince me these pants will stay sewn and on my derriere, so I go back and sew a second line of stitching at the 1/4 inch mark for security.

Repeat these steps with your other set of pattern pieces and this step is complete.

Serger Sewists-  You can serge this entire seam, and there will be no need to go back and sew a second row for security.

Hope this set of instructions is clear, I was lite on photos.

Up Next:  Sewing the Crotch Seam

Monday, October 19, 2015

Facing the Pockets and Joining the Pocket Edges - Style Arc Misty Pull-On Jeans Sewalong

Hello, Friends.  The plague still exists in our home, however I feel like enough of the fog has cleared that I will still be able to post a semi-intelligible bit of instruction, so here goes:


Initially, we are working with the front pattern pieces, and the pocket facing pieces.


With right sides together we are going to stitch each pocket facing to it's respective front pattern piece.


Your notches will help you to remember this, but this seam has a 1/4 inch seam allowance instead of the normal 3/8 inch that most of the rest of the pattern has.  Style Arc tends to use a 1/4 inch allowance on what they call internal seams.


I am still using the lightning bolt stretch stitch here, because the bottom of this faux pocket will need to be able to stretch.

Serging sewists- this is a great application for your serger, just make sure that you follow the 1/4 inch seam.


Once the seam has been sewn, we need to flip the pocket facing to the inside and press it.  Remember to use your silk setting because of the lycra.


This is what the back side will look like after you press the pocket facing to the inside of the garment.


I ended up shearing my fabric at this seam.  For the life of me, I am not sure how this happened.  There are some thin spots in this fabric so I think that it is probably because I just sewed in the perfect spot.  Doesn't leave me real confident that the jeans are going to contain my arse though.  Since I will be twin needle sewing this seam, I am not going to worry about the sheared spot.  The twin needle edge should give me plenty of hold.


Here we twin needle the edge of the pocket.  I line the edge up with the 1/4 inch mark on my presser foot.


Once the edge has been sewn it looks all wonky and rippled.  But, with the magic of a good iron and clapper...


We are able to press the seam back to it's original shape.


Here is what the back of this seam will look like once it is finished.

Now, we move on to the next step which is attaching the front pockets to the pocket facings.  We will need the piece that we just finished working on along with the left and right front pockets.


We need to pin the pockets to their pocket facings.  Remember that your coin pocket goes on the left side, and the plain one goes on the right side.


Make sure that your pocket notches line up the notches in the pocket facings.


Now we are going to sew this seam with a 3/8 inch seam allowance.  To me, this seam would be considered an internal seam, however the seam allowance marked on the pattern is clearly 3/8 inch for this seam.

Serger Sewists- This is a great seam to use your serger as well, just remember to jump back to using 3/8 seam allowance, and make sure you don't accidentally run your front pattern piece through the knife as you are sewing!  Oh the horror!!!


After we have sewn the pockets to the facings, we need to the pocket at the side seam and the waist seam.  Think of this like you are closing the pocket up so that when you sew the side seams and the elastic in to the waist, the pocket won't get bunched or move out of place at these seams.  I used a straight stitch, and sewed these just shy of 3/8 of an inch.  You want your stitches to start just prior to the point where the pocket starts, and stitch on past where the pocket ends.  I went about 3 stitches past, and started about 3 stitches prior.  I used a 3.0 stitch length.  


Once, I was finished this is what the front of the left pocket and left front piece looked like.


This is a view of the back of the left front pocket and left front pattern piece sewn together.


And here is a picture of the finished right pocket sewn to the right front pattern piece.


Friends, I hope I was able to keep everything straight through my brain fog and cold medicine stupor.  Tell me, how are your Misty Jeans coming along?  Let me know if you have any questions.  

I will try to get one post up each day until I have caught back up with the schedule.

Up Next:  Sewing the Inseam


Thursday, October 15, 2015

The Misty Jeans Sewalong - On Pause

Hello, Friends!  Just a quick note to let you know that the plague has hit my house, and I have had to put this little sewalong on pause for a few days.  Once myself and my kiddo are feeling better, I will do double time to get caught back up.  Yes, I am sewing this pattern in real time instead of having  a bunch of scheduled postings.  It feels more authentic that way.

Give me a few days, and things will be back to normal.

Sorry! 

Monday, October 12, 2015

Adding the Coin Pocket - Style Arc Misty Pull-On Jeans Sewalong

Hello, Friends!  The next step in making our Style Arc Misty Jeans is to add the coin pocket.  The directions state, "For the coin pocket fold the seams inward and stitch with a twin needle across the pocket top, pin the coin pocket where marked on the right side pocket bearer, once in place stitch across the base and twin needle each side."

Here are the pattern pieces that we will be working with.  The Pattern Pieces are named the Right Front Pocket and Coin Pocket on the pattern pieces, however the Right Front Pocket is referred to as the Right Side Pocket Bearer in the instructions.

Right Front Pocket Piece and Coin Pocket Piece

The first thing that we want to do is to press back the seam allowance at the top of the coin pocket.  So, set your iron to the silk setting, get out your trusty clapper if you have one, and press that seam allowance back.  A little tip here.  When you are dealing with fabrics that may be hard to fold, if you will warm the fabric with the iron first and then fold the fabric, it will help the fabric keep a sharp crease, and make it easier to press the crease flat.  Does that make sense?  Just don't burn your fingers!

Top Edge of Coin Pocket Pressed Down

Now, we want to run a twin needle stitch across the top of the coin pocket.  Our twin needle should still be in our machine, but just for a reminder we are using a Universal Wide Twin Needle (Size 6.0),  I am still using a 3.5 stitch length.  Somehow, I managed to not take a picture of this step.  I lined the folded edge of the pocket up with the 1/4 inch marking on my presser foot, and ran a twin needle stitch all the way across the top of the pocket.

Once the top of the pocket is stitched, it is time to move on to pressing the side seam allowances of the pocket down.  Once you have done that, this is what your coin pocket will look like (pardon the blur).


Pressed Back Edges after Twin Needle Stitching Top of Coin Pocket

Now, we need to pin the Coin Pocket to the right side of the Right Front Pocket.  Make sure that your folded seam allowances stay folded in when you do this.  Line your Coin Pocket up with your markings on your Right Pocket Piece and pin the Coin Pocket in place  I only pinned the pocket at the top corners.


Coin Pocket Pinned to Right Front Pocket/Pocket Bearer

With our Coin Pocket pinned in to place, it is time to twin needle stitch down the left and right side of the pocket.  We will stitch and reverse stitch at the beginning and end of each seam to anchor the stitches.  You want to start your stitches on the top row of twin needle stitches that run across the top of your coin pocket.

Twin Needle Stitching the Coin Pocket to the Right Pocket Piece

Coin Pocket Twin Needle Stitched to the Right  Pocket Piece

Now, we want to set our machine up to do whichever form of stretch stitch that we have chosen to use.  In my case I am using the lightning bolt zig zag with a 3.0 stitch length.  You should also remove your twin needle from your machine, and insert your Universal 80/12 needle, or whatever needle is appropriate for your chosen fabric.  Refer back to the Sewing the Yoke post if you need help remembering which needle to use with your fabric.

Lightning Bolt Stretch Stitch at 3.0 Stitch Length

Now it is time to stitch across the base of the coin pocket to close the pocket bottom.  I once again have lined the fabric up at the 1/4 inch marking on my presser foot.  You want to start your stitches about 1/2 inch from the Coin Pocket on the Right Pocket Piece.  Stitch and reverse to anchor your stitches.  Now stitch all the was across the base of the coin pocket and about a 1/2 inch beyond, remembering to reverse your stitches at the end of the seam as well.

Stitching the Base of the Coin Pocket

Once you have finished, your pattern piece will look something like this.  You can either snip your threads close on the front side, or pull your threads through to the back and snip them.

Finished Front of Right Pocket Piece with Coin Pocket Attached


View of the Back of the Coin Pocket Attached to the Right Front Pocket Piece

That finishes off this step.  How are you all coming along on your sewing?  I just can't wait to see what everyone does with their Misty Pull-On Jeans.

Next Step: Facing the Pockets and Joining the Pocket Edges