Monday, April 27, 2015

Sewing Room Relocation and Sewing on the Cheap with Estate Sale Finds

Friends, I decided a few weeks back to relocate my sewing room from the huge room in the basement to a smaller room on the main level of our house.

New Sewing Room Location

I know it might seem a bit strange to move in to a smaller space, but I made the decision that I did not want to sew in the basement anymore.  See, every time I go down in the basement, I come up stuffy and when I spend a lot of time down there, it feels like I am getting bronchitis again.  I don't know if it is all in my head or if something is making me feel that way, but I decided to relocate.  The light in this room of the house is amazing!  This is an early morning picture and that is a North facing window, but still tons of light floods in to this room.  Also the room is in the very front of the house across the foyer from the dining room, so it makes it easy to head over there when I need to cut something large out.

Fabric Stash

My fabrics have now been put mostly in to totes.  All the ones that are out of the totes are ones that I have ideas floating around in my head for.  I ordered these sterilite containers online from Wal-Mart.  I am not a big fan of Wally World, but these were cheaper than any others that I found, and will fit well in to the shelves I have planned for them.  They are the 50 qt size, if you are interested.

Sewing Works in Progress

Inspired by Andie over at Sew Pretty in Pink I had a few binge cutting days so that I can get down to the business of creating.  I even used time sitting at the school to pick my kiddo up for cutting out new patterns.  It was great.  Pattern cutting is my LEAST favorite part of sewing, but doing it in the car during this time helped to make me feel productive during what is normally a dull 45 minutes sitting at the school!

Serger Desk

This is my serger desk in progress.  My husband picked this vanity up for a couple bucks at a yard sale last year.  The drawers hold my serger cones, machine manuals, sketching materials, assorted closures and elastic, as well as a whole drawer slam packed with vintage zippers.  The plan for this desk is to paint it white and then glaze it with a french green that will pick up all the details.  It should look pretty awesome, I just need the weather to get a little warmer to take her out in the garage and get my paint on.

Sewing Machine Desk

This is my sewing machine desk.  She was a freebie on Craigslist a few years ago.  She was very ugly and stinky when we got her, but I could see the pretty in her.  A coat of primer and a few coats of paints later, and the cigarette smell has been neutralized and she is as pretty as I could ever hope a free sewing desk to be! She holds my needles and thread, as well as various notions and button inside.


Comfee Sewing Chair

To carry on the theme of Sewing on the Cheap, meet some of my latest estate sale finds.  Here we have a Comfee sewing chair.  This is a link to the model that I have except mine is vintage with slightly different casters.  MSRP is $349.99 and that site is selling it for $284.95.  I paid $3, talking the estate sale dealer down from $5.  I never thought a sewing chair would be revolutionary, but in the short time I have had this baby, my back is feeling so much better!  It is fantastic, and knowing what I know now, I would have bought one of these at full price a long time ago, but I am glad I didn't since I got this baby for a steal!


I also picked up these great items for $5 total (I never pay full price even if it is cheap).  The bag on the left is a bag full of assorted pressing cloths.  There is everything in there from organza and canvas to twill, and one of those netted scorch protectors.  In the middle is a bag full of cover yourself buttons.  There are assorted sizes and shapes in here.  Over 100 buttons total.  The bag on the right is a full of cheesecloth and a set of ironing board cover fasteners.  The little box of push pins is a pound of push pins but honestly, I am not sure how useful they are going to be for me.  When I opened them up, they are pretty large gauge.  Not sure exactly what fabric I would use them with.  Maybe I am just being picky because I have gotten so used to using fine pins!

StyleArc Response and Fabric

One last order of business.  I got my package in the mail from StyleArc in record time (they sprang for expedited shipping).  I have to give them so many kuddos.  They sent a pattern that is sized directly to my dimensions, along with a hand written note.  I don't know about you all, but with this digital age we live in, a hand written note goes a long way and earns a lot of respect from me.  The replacement fabric they sent is two yards of a very nice black stretch bengaline.  Not the cheap stuff you find in the big box stores, this is comparable to what you find in fine department store RTW items.  It's got about 30 percent stretch in the warp and zero stretch in the weft.  It will be fantastic for making the Jennifer City Shorts again, and I have a Liberty of London knit purchased from fabric.com that I think will make a phenomenal top to go with them.  They also sent me two StyleArc tags, which I love.  So, Chloe and the girls at StyleArc, if you read this I want you all to know that you have gone above and beyond my expectations!  Thank you so much for FANTASTIC customer service!

So friends, tell me do you sew on the cheap?  What tips do you have to keep this hobby from emptying the coffers?  Also, let's not forget to pour a little bit more love on StyleArc for going above and beyond.

***I do not get paid for linking to any product or other blog so please know that my opinions here are genuine, if I start getting paid you will be the first to know! ;)***

Friday, April 17, 2015

Response From StyleArc

Hello Friends, and Happy Friday!  I have been out enjoying the lovely weather today, and visiting a GREAT local fabric shop (more on that next week) but you can get a peak at that on my instagram.

I posted a review of the StyleArc Jennifer City Shorts last week, and I wanted to quickly let you all know that I received a response from StyleArc and here is what they said verbatim:

Hi Alicia, 

Firstly please accept our apologies for this late reply but we have been checking this pattern over and over again.
It seems you are right,  the sizing is a about 1 1/2 sizes too small when we get to the size 30.  This is a mistake, thank you for pointing it out to us. 
I'm sorry you are disappointed and sorry you went to the trouble of making this short only to find it too small.
We have now re-graded it and we are sending you another print out for your to look at and maybe remake?   
We are also sending you a length of fabric.

We realize this doesn't make up for your loss of time and fabric but we hope it will go toward making amends.

 Also attached are grade sheets for basic tops and pants.

We will put a parcel in the mail to you today.
Chloe, Lyn and Liz

In case you are wondering, the grade sheets that they are referring to were just sheets showing me how to grade the pattern based on my largest measurement overage.  It didn't take in to account that my size varies...but I digress.

I responded back that I would try the pattern again when it comes in the mail, and bluntly asked if I should be concerned that there may be discrepancies with the other patterns that I purchased from them.  I received a reply back that detailed the amount of positive ease or negative ease in each pattern and that the patterns do fit according to the chart.

StyleArc is back in my good graces for now, but we will see what happens when the pattern and the fabric get here.  What do you think friends, did StyleArc handle this well?

Hope the weather where ever you are is an beautiful as the weather here is, and that you all have a great weekend.

Tuesday, April 7, 2015

Pattern Review: StyleArc Jennifer City Shorts...The Plus Size Edition

A while back I ordered a few patterns from StyleArc.  One of which was the Jennifer City Shorts.  I had planned to make them for my cruise in February, but because the mail was running slow I was not able to get them made.  Now, I am glad that I didn't waste my pre-cruise sewing time!

The front of the shorts

The back of the shorts

They do look like the drawing on the pattern (albeit a much wider version)!  You might be wondering why I am not wearing them in these pictures, and we will get to that shortly.

Photo from StyleArc.com

My current measurements are 52-52-64.  The size 30 from StyleArc is supposed to fit a waist of 50.5 inches and hips up to 61 inches.

Size Chart information from StyleArc.com

In light of this size discrepancy, I added four inches total to the hips, and went ahead with two inches at the waist, because an extra half inch at the waist ain't gonna hurt nobody.  Is it weird that I now have Kid N' Play songs running through my head?

Anyway, when I was cutting the pattern out, the pattern pieces seemed small to me, but I was thinking they were going to be short from the waist to the crotch, not too narrow.  Lo and behold I get enough of the shorts together to pull them on, and they won't go over my thighs.  Wah, wah, wahhhhhhhhh!

I laid them out flat and measured them, and with my four inches added at the hips the shorts were still only 60 inches at the hips.  Had I not added in the extra width, they would have only been 56 inches ya'll!  That is five inches of negative ease in a pattern made specifically for wovens.  

I contacted StyleArc to find out if maybe the pattern had printed wrong, or to at least give them a chance to explain the discrepancy, but as of the date of this publishing I have not heard back.  If I do hear back, I will update you all with the information.

As a curvy diva on the high end of most plus size patterns, I was stoked to see that all of StyleArc's patterns are offered up to a size 30.  Now, I am left wondering if the other patterns that I ordered are even going to fit.  I will definitely measure the pattern dimensions before cutting in to my fabric next time.

But the pattern did have some cute details so let's highlight a few of those.


Here we have a great slit at the bottom of each of the legs on the outter thigh.  I really like this detail and will use it in other patterns that I make.  It is really a simple detail to create, but it gives the shorts that little extra bit of something.


I bias bound the waist facing with a contrasting blue to match another detail I will show in a minute.  This was a fantastic fly zipper insertion.  Instead of following anyone's tutorial (they were all making my head spin), I kind of reverse engineered it, and I am pleased as punch with how it turned out.


The slash pockets were lined with a cotton from my stash that was a great match for the twill, and I thought the addition of the royal blue polka dots made for a cute detail!  This was why I chose to use the royal blue bias binding on the waist facing.  I had a cute royal blue button to match too, but I was so mad about the fit, that I decided to throw on a shell button and save the royal one.  

On a side note, the metal zipper, bias binding, and button I had planned to use were all from my stash of vintage notions.


This has to be one of the best button holes my machine has produced thus far!  Drats!!!  I did not sew the waist facing down in the manner suggested.  Instead I tacked it at the side seams and at the fly.

For those of you who have not sewn with StyleArc patterns before, one thing you need to be aware of (aside from the fit issue); StyleArc patterns do not come with a lot of directions.  There are directions, they are just very vague.  If you are a newbie, this might be a bit intimidating.  I found it refreshing to not have my hand held and actually have to think about how the pattern went together and figure some things out on my own.  I would even go as far as to say I like this style of directions.  I actually had to use my brain.

If I were to make these shorts again, I would add faux welt pockets to the back of the shorts.  With the yoke waist in the back there is a whole lot of real estate back there that needs a little something to break things up...if you know what I mean!

I am going to hold on to these shorts, as my size tends to float around a bit.  Maybe by June or July they will fit, and I won't feel like all is lost.

This is how I rate the pattern:

Size Range:  4 - Though they did not fit according to the size chart, there is still a large range of size here, better than most pattern companies.  You should note though that StyleArc patterns are one size on the page.
Instructions:  2 - As noted earlier, the instructions are very basic.  This was great for me, but for a beginner or someone who has only sewn from the Big 4, I think this would cause a lot of confusion.
Construction Process:  4 - The shorts went together fairly easily, and there were not a ton of pieces to deal with.  It took me around 3 hours to sew this pattern and another hour to cut it out.
Final Fit:  0 - I have to give it a zero since the shorts would not even pull on.
Overall:  2.5 
So tell me friends, have any of you sewn a plus size StyleArc pattern before?  If so, what were your results?  One other little thing, I am on Instagram now...follow me @pandorasews

Tuesday, March 31, 2015

Sewing Knits With A Twin Needle...The Unofficial Tutorial

Friends, it has been all over the sewing blogosphere lately that people are having problems using a twin needle with knits.

The stitches look wonky, but I promise they aren't!


I too was having this problem until very recently when I read my manual, and my child read the back of the needle package and told me I was doing it wrong (thank goodness for little boys that read everything they can get their hands on and love to prove Mommy wrong...I think!).  After much research and combing blogs and YouTube, this is what I have come to learn.  I hope that these tips will be helpful for some of you as well.

This first one is one that I have always known, but I guess a lot of people didn't realize.  You don't need two rolls of the thread you are going to be using.  Simply wind a bobbin with your thread color and use that as your second roll.


Your rolls of thread should be spooling in opposite directions.  So if the thread you are using for the left eye is unrolling clockwise, then the spool you are using for the right eye should unroll counter clockwise.


If your machine does not have a second spool holder, you have two options.  You can either thread your spool and bobbin on one holder or you can use the peg that is for winding bobbins for your second holder.  The choice is yours, just see which gives you a better look.

On some but not all machines you can see the pressure plates that give your upper thread tension.  If you can see these and manage it, you should thread your left thread to the left of the pressure plates, and your right thread to the right of the pressure plates.  I don't have a picture of this as my machine isn't made so that I can see the pressure plates.

If your machine has a twin needle setting make sure to select it.  It does some kind of adjusting of tension, though I can not see a real difference on my machine if I do or don't select this feature.


This next tip is probably one of the biggest mistakes most of us are making.  When you thread the needle, thread the left needle through the thread holder/bar that is just above the needle.  When you thread the right needle, DO NOT thread it through the thread holder that is just above the needle.  I know...shocking, right?  This is supposed to really help with the tunneling effect that can sometimes happen when we are sewing knits with a twin needle.


Some people like to prepare their fabric with knit stay tape.  I especially recommend this if you are using a lighter knit, but really find it to be an unnecessary step with heavier knits.  With this t-shirt weight knit I just pressed the hem under an inch.


One good thing that knit stay tape does do though is give you a line to follow since you can't see where the fabric ends since you are stitching on the right side of the fabric.  Since I know that my hem is pressed under an inch, I know that if I line my fabric up at the inch mark, then the two needles will fall on either side of the hem/raw edge.


Make sure that you are not stretching the fabric as you sew it.  This will lead to upper loops that rise up from the fabric.  Just let the feed dogs do their magic, and while you are at it, slow down.  Sewing fast is not going to be helpful here.  I usually line my index finger of my right hand up with whichever measurement guide I need to be at and let that be the only thing that guides my fabric through the machine.

Your goal with the double needle is to straddle the cut edge of the fabric so that one line of stitching is above the actual raw edge and one line is below, thus encasing your raw edge.


See how the upper threads get pulled to the underside, and the bobbin thread ends up making a zig zag between the upper threads?  That is what gives the twin needle stitch it's ability to stretch with stretchy fabrics.

Finally, make sure to spread your stitch out some.  I prefer a stitch setting of 3.0 for twin needle stitching on knits.  I also end with a back and forth stitch so that I don't have to tie off the ends, but that is just my preference because it seems that when I try to tie them off, I manage to tie too tightly and mess up the stitches and cause puckering.

I hope that you find these tips helpful.  Please feel free to comment with any additional tips that any of you might have.

Sunday, March 22, 2015

When Life Gives You A Wadder - Simplicity 1356

Friends, this tale starts with two sets of sheets I found on clearance at Target for $5.08.  Extra long twin sheets which yield about 6 yards of good usable fabric...woot woot!


The label on back of the package said they were a cotton rayon blend, and they had a great hand, so I figured I loved the prints, so why not.  Why not, indeed!  Upon opening the sheets they were in fact 100% polyester, and at that point I should have decided to save them for bright and colorful lining for a future project.  How did I overlook the whole Microfiber nomer on the front of the package?

Instead I charged right ahead in to making them in to Simplicity 1356.  Simplicity 1356 is supposed to be a reversible dress, but I intended to make it in to more of a tunic length (imagine that).

This is what I ended up with...I HATE it!


He says, "Try to look happy."  She says, "I can't look happy wearing this!"


He says, "Show me the other side."  She says, "You are about to see my other side!"


I was standing with my hips shifted, the hem is straight, though not really a hem.  I should have taken a sway back adjustment.


He says, "I like this side much better."  She says, "Grrrrr!"


He says, "Show me the lining and try to look happier."  She says, "GRRRRRRR!"

Needless to say, this pattern is not going on my list of favorites.  I worked hard to take this from a size 22 up to my measurements.  Simplicity 1356 just isn't the pattern for me.  I am not big on the whole saying a pattern is or isn't flattering, but this one is doing nothing for me, or my self confidence!  If I do hold on to it, it will be only to use it as a garden apron.

Friends, please tell me your sewing has gone better than mine this week!

Thursday, March 12, 2015

The End of the Fluff...Onward Sew!

Friends, as I looked back over my blog for the last few months, I realize that I have been feeding you a lot of fluff.  Well...the fluff ends here.

Deadlines had been dragging me down.  First there was sewing cruise wear (which I didn't blog a whole lot of), and then I had to make a Frontiersman costume for my son, because apparently second grade research projects are intended to torture parents just as much as they do the kids.

Now, with a clean slate I feel like I can start to create again.

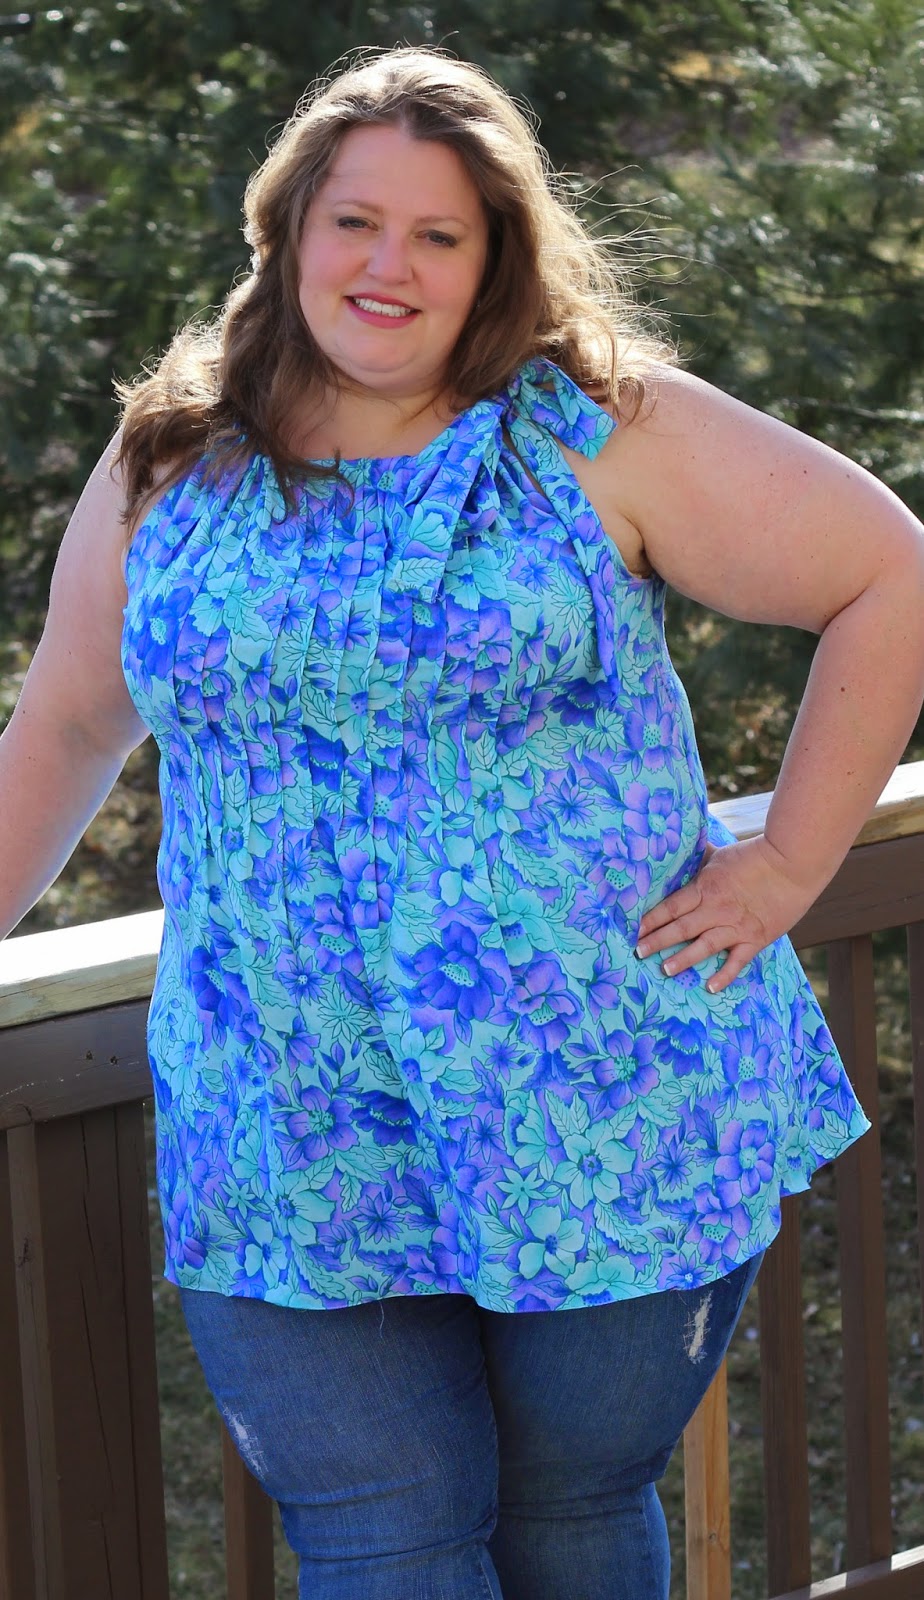
So without further ado, here is my latest sew or refashion as it may be.


This shirt is very typical of what you would see me wearing out and about during the warmer days of Spring and Summer.  I own a few RTW shirts in similar styles.  Would you call this a pillowcase tunic, maybe?

As I mentioned before this is a refashion.  Here is what I started out with.


When I saw this dress at the Salvation Army last Fall, I loved the print.  Purples and aquas are my favorite colors.  I also really liked the pin tuck detail on the front of the dress.  Throw in the fact that it was only 99 cents, and it was a no brainer.  I knew that I could do something with it.

So when I was looking for a refashion to get me out of my sewing slump, and I came across this in the pile, I knew it was just what I needed to get me out of my funk.

It took some seam ripping, and the removal of a zipper.


I also removed the sleeves, and cut seven inches off of the bottom of the dress.  I biased bound the new arm holes, and cut the shoulder seams out.  The collar edges were trimmed and serged, and then folded in an inch and sewn to create two tunnels for the tie fabric to thread through.


I finally used my rolled hem foot to create a rolled hem all the way around the bottom of the tunic.  I cut the tunic a little long because I suspect that I may belt it sometimes when I wear it, and I wanted to make sure there was enough ease there that everything that I want to keep covered stays that way.


Here are some more pictures of the tunic.  I really am pleased with it, and it makes me look forward to warm bright sunshiny days ahead.


I am completely in love with how the pin tucks added interest to this tunic.  They hug the bosom just right.  With the mix of colors and style of the tunic it is almost Bohemian meets Caribbean.


You don't tend to see a whole lot of plus size refashions online, but I hope that this one might encourage some of you to give refashioning a try.  This dress wasn't even my size (RTW 22 and I am easily a 24/26), but the print just made me feel happy, and the rayon that it is made of had a great hand, so I knew there was something great hiding inside!

Friends, I say head out, hit a thrift store, and come home and make something beautiful.  Am I the only plus size refashioner out there?

Monday, March 2, 2015

And the Winner Is....

Friends, sorry I am running a few hours late getting this posted.  There is just a whole lot of life happening here.

Without further ado, the winner as generated by random.org (there were 24 original commenters) is:

Congratulations to Commenter #8, mlhummy!

Mlhummy, since your profile was not connected to an email address, you have until Wednesday at 12:00 pm EST to contact me at pandorasews at gmail dot com with your mailing address.  If I don't hear from you by then another poster with be selected!